自動接続スクリプトの登録
目次
概要
「空のオブジェクト」の作成
自動接続スクリプトの登録
MonobitViewID の変更
MUNのネットワーク接続をノンプログラミングで行なう
先のページの自動同期通信スクリプトと同様に、続けて以下のスクリプトを使用し、
サーバへの接続、および同一ルームへの入室、プレイヤーキャラクタの登場までの
一連の処理を簡単に組み込んでみましょう。
【自動接続スクリプト】
クライアントとしてサーバにログインし、
プレイヤーキャラクタを登場させるためのスクリプトです。
「空のオブジェクト」の作成▲
シーン上に「空のGameObject」を追加する
スクリプトを動かすためには、あらかじめシーン上のオブジェクト、あるいはプレハブに対し、
動かしたいスクリプトを登録しておく必要があります。
自動接続スクリプトも例外ではありません。
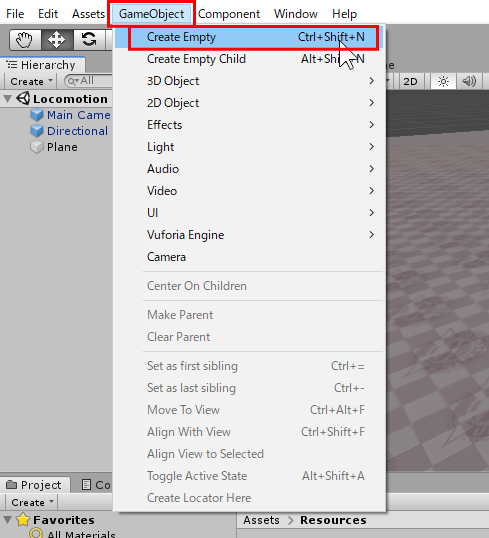
まずシーン上に「空のGameObject」を追加しましょう。
Unity のメニューから、GameObject > Create Empty を選択します。
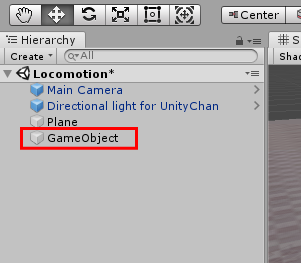
Hierarchyビューに、シーンに何の効果も与えない「GameObject」が新規に生成されます。
自動接続スクリプトの登録▲
「自動接続スクリプト」を登録する
作成した「空のGameObject」に「自動接続スクリプト」を登録します。
Hierarchyビューに追加したばかりの「GameObject」をクリックして選択してください。
選択した状態で、Inspector にある [ Add Component ] のボタンを押します。
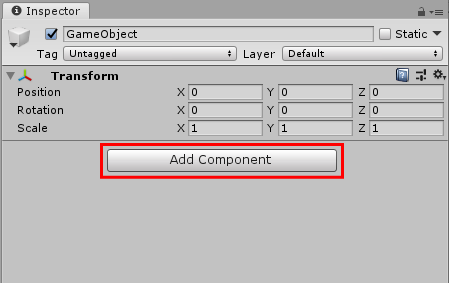
Add Component のプルダウンメニューから、
Monobit Networking Support > Monobit Auto Login Templete を選択します。
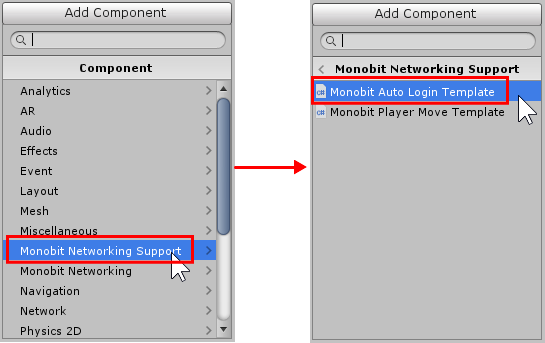
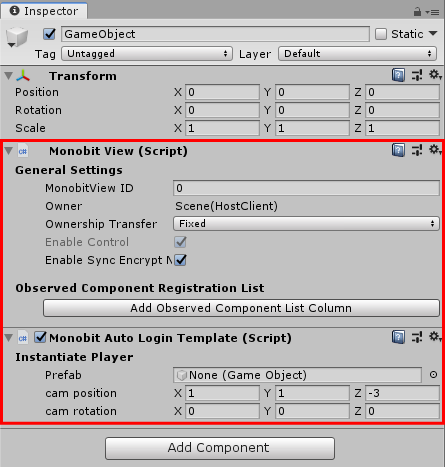
以下のように「Monobit View」と「Monobit Auto Login Templete (Script)」が追加されます。
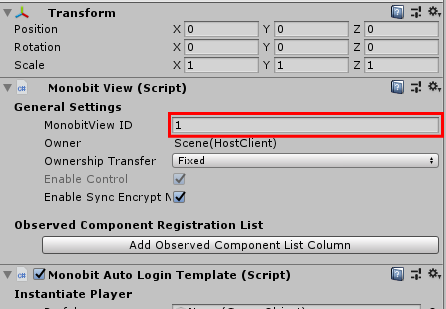
MonobitViewID の変更▲
MonobitView ID を変更する
作成したMonobitView コンポーネントの ID パラメータを変更します。
ライブラリの規定により、使用される MonobitView コンポーネントについて、
シーンに配置されたオブジェクトの MonobitView ID は 1 ~ 999 の範囲内に収める という
取り決めがありますのでこれに従います。
今回はこの数値を「1」に変更し、Enterで適用させましょう。