コンテンツの準備
目次
概要
ユニティちゃんコンテンツを利用する
ベースとなるシーンを開く
シーンを編集する
UnityChanのコンポーネントを編集する
シーンを保存し、ビルド登録する
本来ならば、別途、コンテンツを用意する必要があります
MUNは「ネットワーク通信のための専用ライブラリ」ですので、例えばシーンやプレハブなどの、
マルチプレイしていることを「視認」するための、オリジナルコンテンツは用意しておりません。
通常のゲーム開発であれば、「自作コンテンツを使用する」場合がほとんどだと思いますが、それは後述するとして。
いち早く「ノンプログラミング開発」の方法について触れていただくために、
今回は手始めに、公開アセットデータを使って、開発プロセスを踏むことにしましょう。
ユニティちゃんコンテンツを利用する▲
「ユニティちゃん 3Dモデルデータ」を利用する
今回は「ユニティちゃん 3Dモデルデータ」のアセットを利用します。

この作品はユニティちゃんライセンス条項の元に提供されています。
ベースとなるシーンを開く▲
Locomotion.unity のシーンを開く
ユニティちゃんのアセットから、今回のノンプログラミングサンプルのベースシーンとなるファイルを開きます。
Project ビューにある UnityChan フォルダ内の Scene フォルダの中に、Locomotion(Locomotion.unity)があります。
これをダブルクリックして開いてみてください。
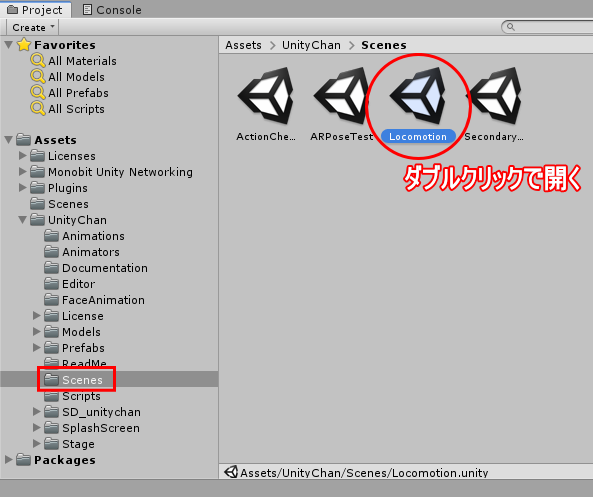
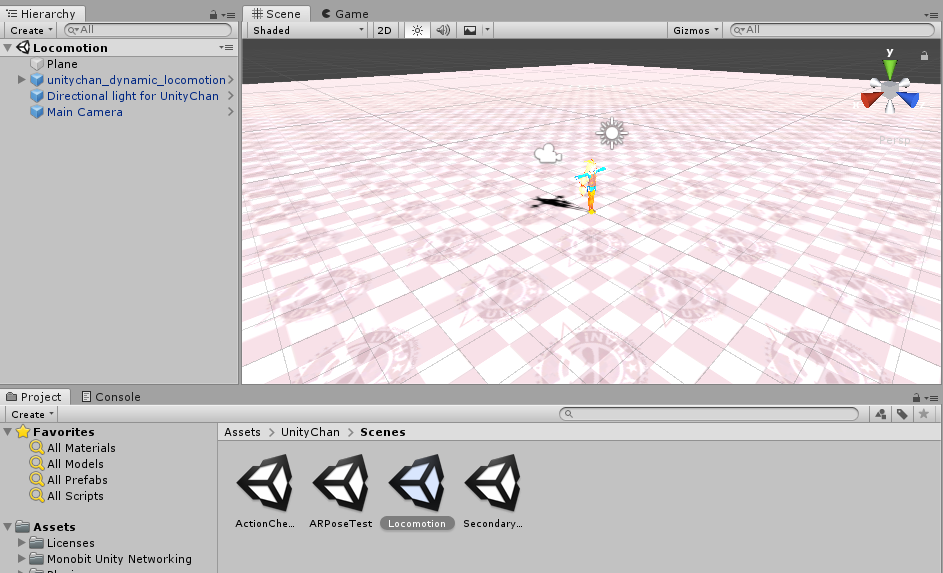
Locomotionのシーンが開き、SceneViewerに表示されます。
シーンを編集する▲
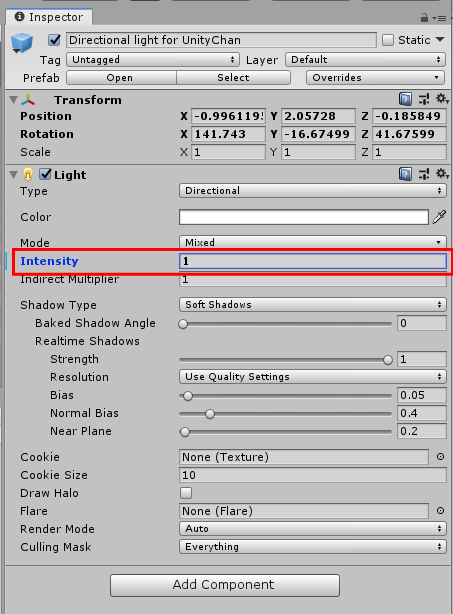
Directional-Lightの調整を行なう
ロードした Locomotion のシーンは、デフォルトの状態では明るすぎるため、ここでライトの調整を行ないます。
Hierarchy ビューにある「Directional light for UnityChan」と書かれた項目をクリックします。
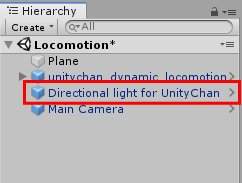
Inspector に表示される項目のうち、Light 内の Intensity の項目の値を「2」から「1」に変更し、Enterキーを押します。
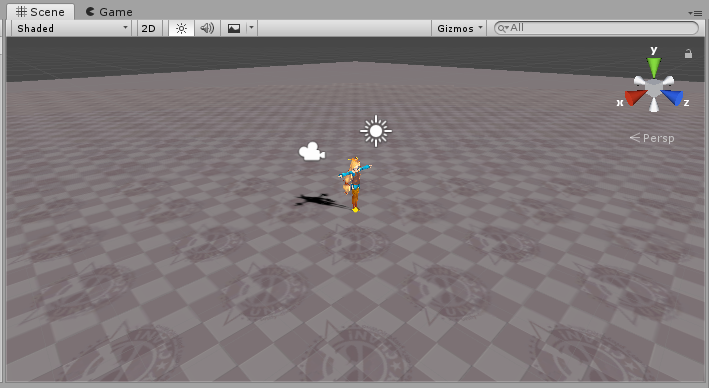
明るさが抑えられ、以下のような色合いに変化します。
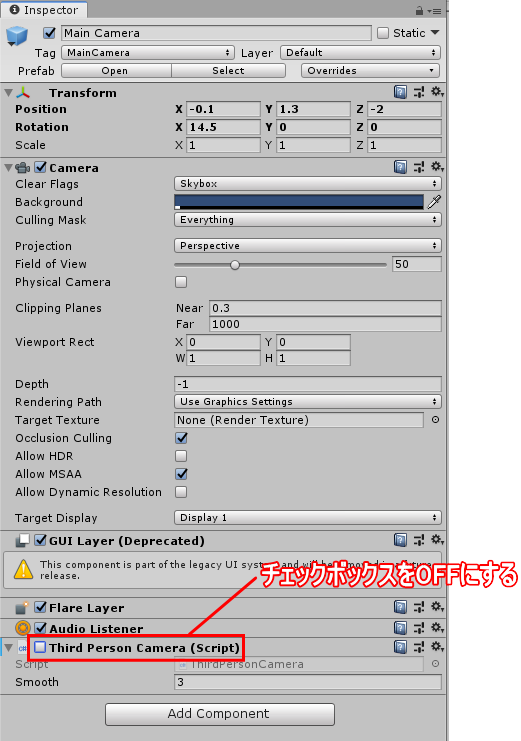
Third Person Camera をOFFにする
また Main Camera に登録されている、Third Person Camera のスクリプトは不要ですので、OFFにしましょう。
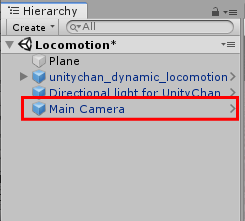
Hierarchy ビューにある「Main Camera」と書かれた項目をクリックします。
Inspector に表示される項目のうち、「Third Person Camera (Script)」のチェックボックスを OFF にしましょう。
UnityChanのコンポーネントを編集する▲
シーン内のunitychan_dynamic_locomotionを編集する
シーン内に存在するunitychan_dynamic_locomotionを編集して、プレイヤーキャラクタとして動かせるようにしましょう。
hierarchyビューにある「unitychan_dynamic_locomotion」を選択してください。
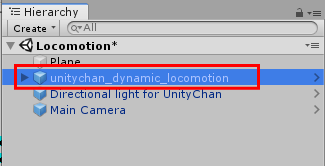
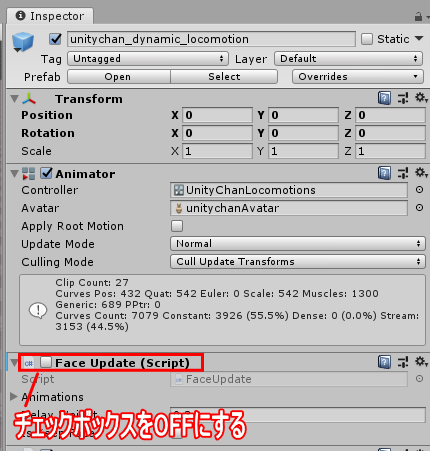
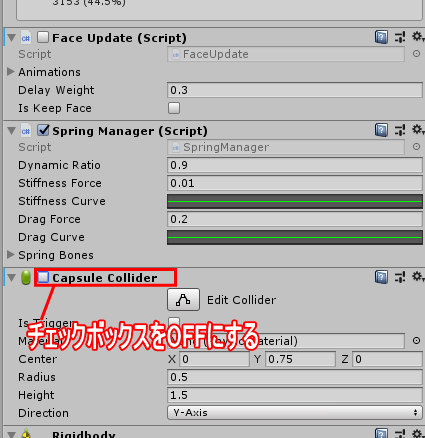
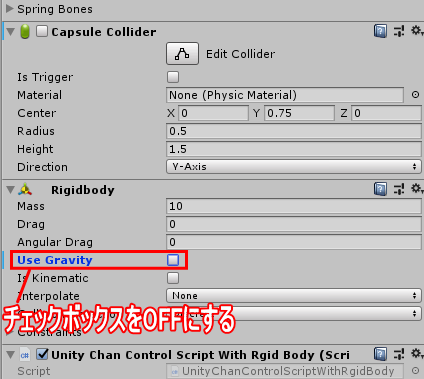
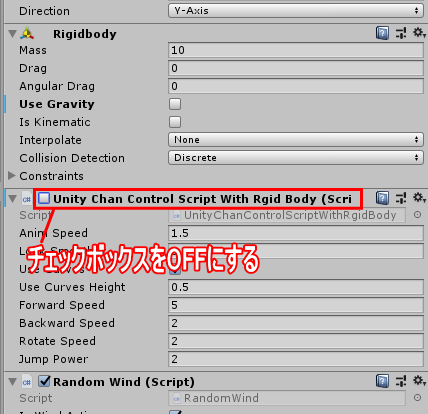
Inspector に表示される項目のうち、以下の項目のチェックボックスをOFFにしてください。
・ Face Update (Script)
・ Capsule Collider
・ Rigidbody 内の Use Gravity
・ Unity Chan Control Script With Rgid Body (Script)
シーンを保存し、ビルド登録する▲
シーンを保存する
現在のHierarchy情報をシーンファイルに保存します。
Unity のメニューから File > Save As... (または Save Scene as...)を選択します。
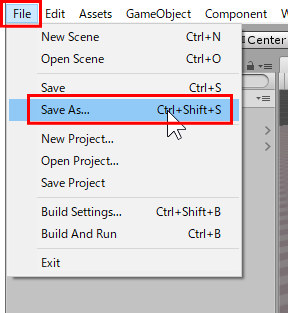
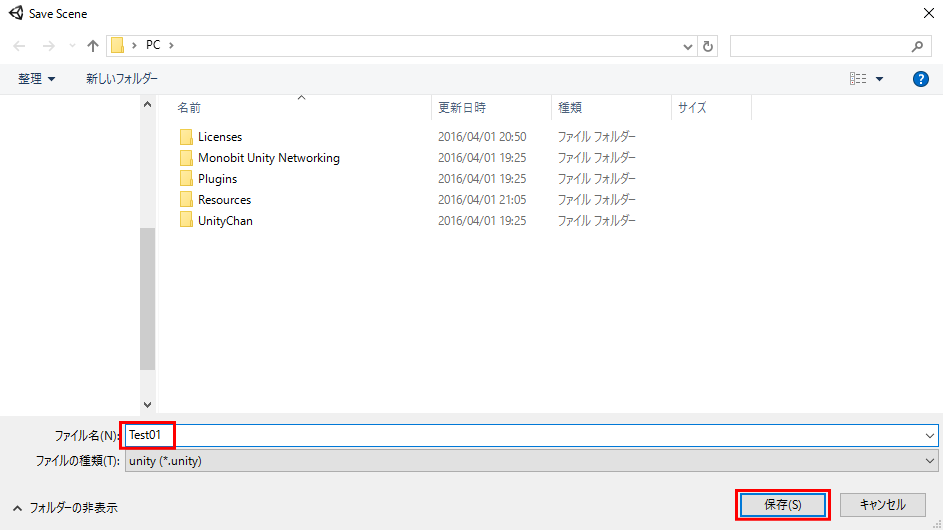
任意のファイル名で保存します。
今回は「Test01」にして、[保存] ボタンを押しましょう。
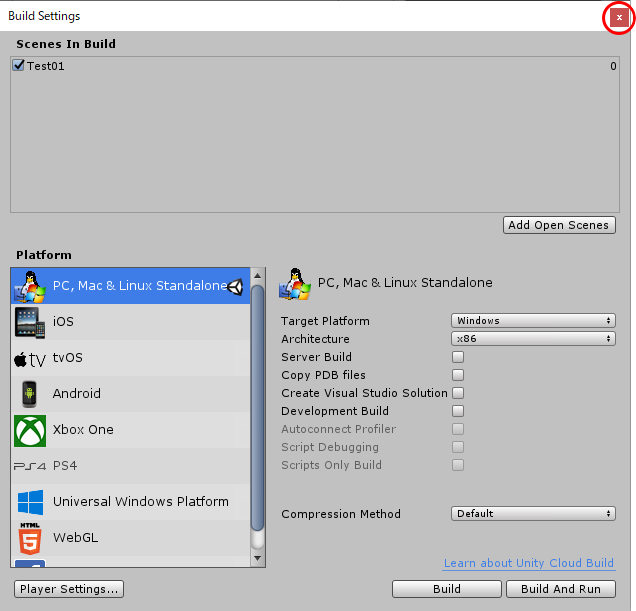
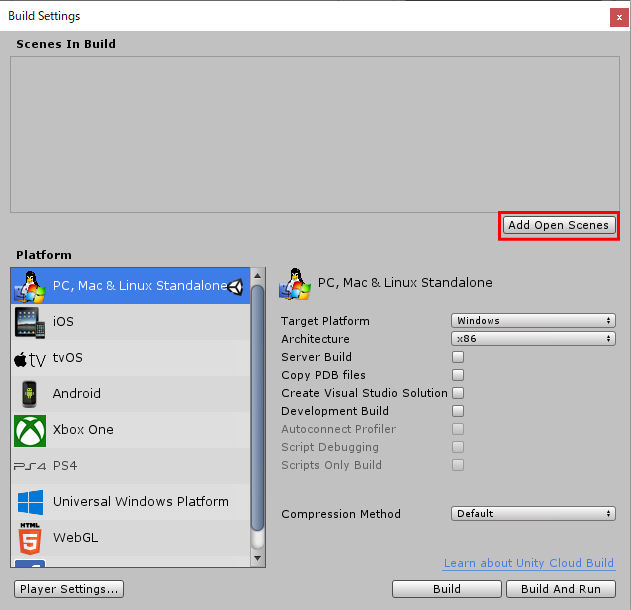
ビルドに登録する
保存したシーンファイルを「Scenes In Build」に登録します。
Unity のメニューから File > Build Settings... を選択します。
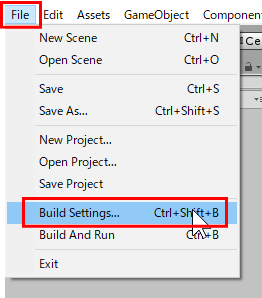
Build Settings ウィンドウが表示されたら、Scenes In Build の右下にある「Add Current」のボタンを押します。
以下のように Scenes In Build に登録されていることを確認しましょう。
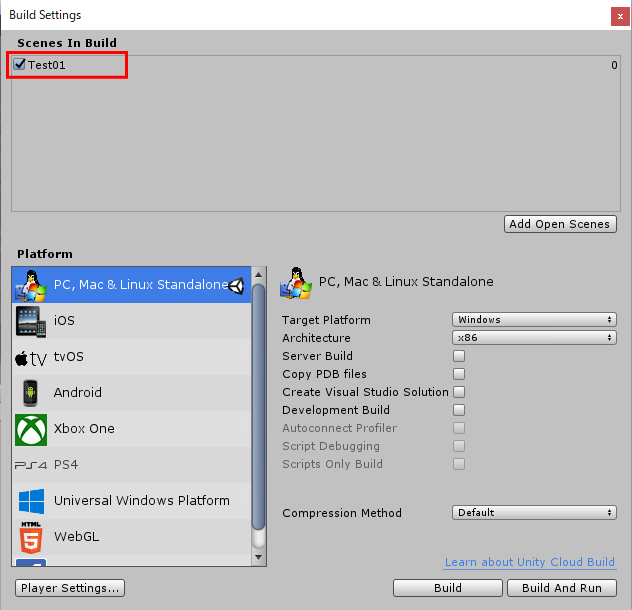
登録されていることを確認し終えたら、右上の×ボタンを押して、Build Settings ウィンドウを閉じてください。